
Overview
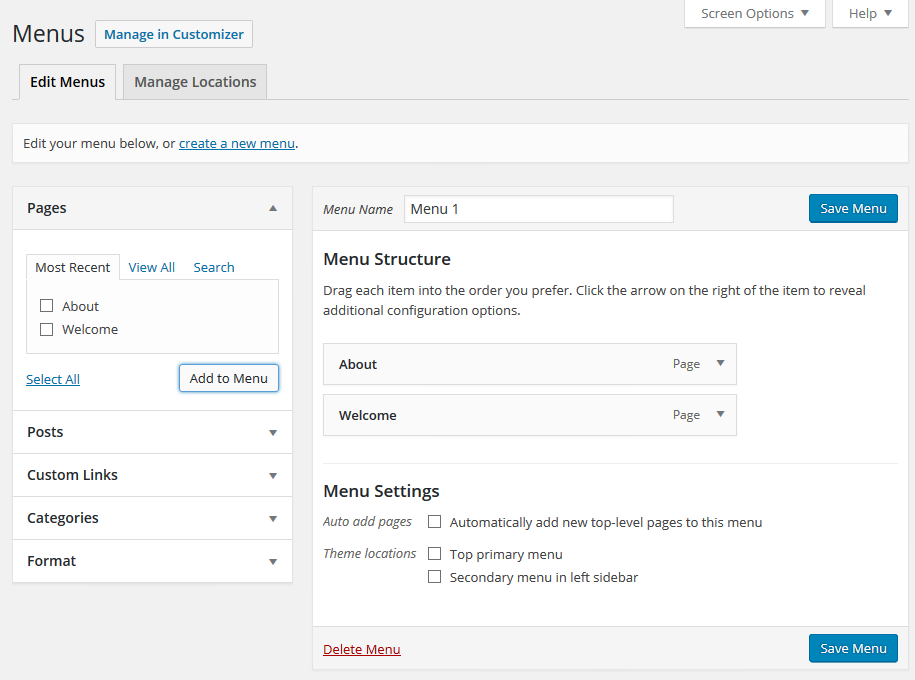
In the WordPress Admin Dashboard, click Appearance…Menus. The Edit Menus screen appears:

The Edit Menus screen lets you create, edit, and delete menu entries, along with changing the order of the entries and creating “child” menus that appear underneath the main “parent” menu entries.
The Importance of Planning
Give some thought to your menu structure before you create it. Be careful rearranging menu entries – it annoys visitors. It’s like someone snuck in and rearranged the contents of their kitchen cabinets overnight.
Menu Entries May Scroll Off the Edit Menus Page
The Menu Structure box uses a drag-n-drop interface, and newly-added menu items appear at the very bottom of the screen. That can make them tough to drag in place. You may want to try this trick to shrink the screen temporarily – press Control and the minus sign together a few times until you can see the whole menu in the Menu Structure box. Drag-n-drop the menu entries, click Save Menu, and press Control and the plus sign together the same number of times you shrunk the screen.
Adding a Page to the Menu
- In the left column, click the Pages block to expand it. The Pages block expands to show three tabs to help you locate pages: Most Recent, View All, and Search:
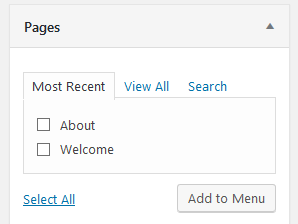
- Locate the page you want to add to the menu and click the checkbox next to the page name.
- Click Add to Menu. The page name block appears at the bottom of the menu.
- Drag-n-drop the page name in place.
- Select the text in the Navigation Label box and edit as desired.
- Click Save Menu.
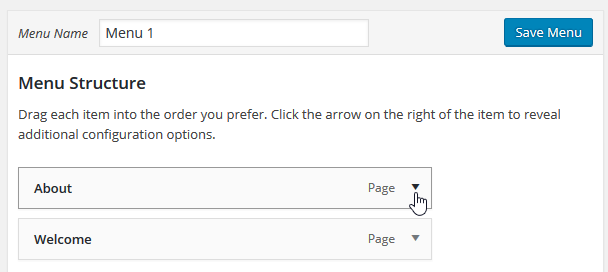
Editing the Link Text for a Menu Entry
- Click the down-pointing triangle at the far left of the page name block:
- Select the text in the Navigation Label box and edit as desired.
- Click Save Menu.
Deleting a Menu Entry
Note: If you delete a post or page, remember to go in and delete the menu entry.
- Click the down-pointing triangle at the far left of the page name block:
The block expands:

- Click Remove. The menu entry block closes and disappears.
- Click Save Menu.
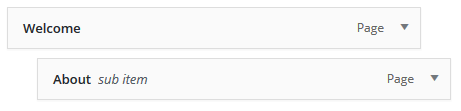
Rearranging Menu Entries
The Menu Structure block in the right column represents the site menu. Each entry that is flush with the left margin represents a top-level menu entry. The entries above are top-level, and the resulting menu runs horizontally:
![]()
To create a child menu entry, add the entry and drag it into position below the parent entry, indented to the right:
IMPORTANT:
- The drag indent is finicky; sometimes the entry does not land where you want it. If this happens, try dragging the entry back to the left.
- Some themes do not support child menus.
- Child menus can cause problems on mobile devices. Try accessing the site on a mobile device and see if the menu works the way you anticipate.